Ever stood at the base of a crag, tilted your head back, and felt that magnetic pull? That whisper of adventure that says, “I wonder if I could climb that?” It’s a powerful feeling, a call to challenge yourself physically and mentally in a way that few other activities can.
But between you and the summit, there’s a crucial step: getting the right gear. The wall of shiny, technical equipment at your local gear shop can be intimidating. What’s essential? What’s just for the pros? It’s enough to make anyone’s head spin.
Don’t let gear confusion keep you grounded. We’re here to cut through the noise. This guide is your roadmap, breaking down the absolute essentials of top climbing gear for any beginner. We’ll focus on safety, comfort, and building a solid foundation for your vertical adventures.
Table of Contents
Let’s gear up and get you ready for that first “on belay!”
1. Climbing Shoes: Your Direct Connection to the Rock
Think of climbing shoes less as footwear and more as precision instruments. Your feet are your foundation on the wall, and regular sneakers just won’t cut it. Their clunky soles and lack of grip will have you slipping off holds and learning bad habits.
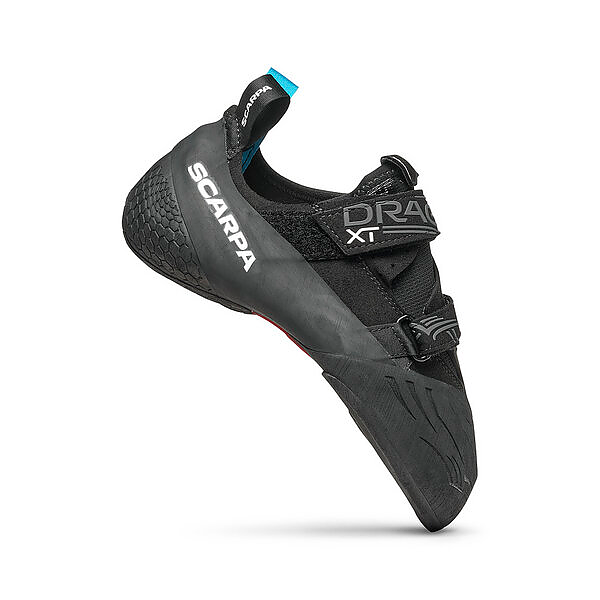
Why They’re Essential: Climbing shoes are engineered with one purpose: to stick to rock. They feature ultra-sticky rubber soles that provide incredible friction on even the tiniest of foot jibs. The snug, precise fit allows you to feel the rock beneath your toes, transfer power efficiently, and stand on holds you’d never think possible. This is the single most important piece of performance gear you will buy.
What to Look for as a Beginner: Your first pair of climbing shoes should prioritize comfort over aggressive performance. You’ll see pros wearing shoes that are dramatically downturned and look painfully tight. That’s not for you… yet.
Look for a shoe with a “neutral” or flat profile. This will be far more comfortable for long sessions at the gym as your feet get used to the unique demands of climbing. Choose a durable rubber that can handle the scuffs and scrapes of learning footwork. Finally, consider the closure system: velcro is fast and convenient for taking shoes on and off between climbs, while laces offer a more customizable, snug fit.
The MindGearMen Pro-Tip: Don’t buy your shoes online for your first pair. Go to a reputable gear shop and try on as many pairs as you can. Your street shoe size is just a starting point. A good fit should be snug all around, with no dead space or air pockets, especially in the heel. Your toes should be flat or just slightly curled, but never painfully crunched. Remember, if your shoes hurt too much to stand in, you won’t want to climb.
2. Climbing Harness: Your Command Center for Safety
If climbing shoes are your connection to the rock, the harness is your connection to the safety system. This is the piece of top climbing gear that will catch you when you fall, allow you to rest mid-route, and lower you safely back to the ground. It’s your personal command center.
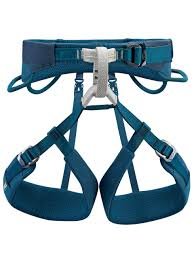
Why It’s Essential: A harness is designed to distribute the force of a fall across your hips and thighs, preventing injury and making the experience of being on a rope comfortable. It connects you directly to the rope via your belay loop and features gear loops for carrying additional equipment as you advance. Simply put, you cannot climb on a rope without one.
What to Look for as a Beginner: The best beginner harnesses are all about comfort and adjustability. Look for a model with padded waist and leg loops. You’ll be spending a lot of time hanging in it while learning, and that padding makes a world of difference.
Crucially, opt for a harness with adjustable leg loops. This allows you to get a perfect fit whether you’re climbing indoors in shorts or outdoors in thicker pants. It also makes the harness easier to put on and take off. Ensure any harness you buy is certified by the UIAA (International Climbing and Mountaineering Federation) or CE, which guarantees it meets rigorous safety standards.
The MindGearMen Pro-Tip: When trying on a harness, tighten the waist belt first. It should sit snugly above your hip bones. You should be able to fit a flat hand between the belt and your body, but not a fist. Then, adjust the leg loops. They should be snug but not restrictive. To test it, hang from a rope in the shop if they allow it. This gives you a true feel for how it will perform under load.
3. Belay Device and a Locking Carabiner: Your Partner’s Lifeline
Climbing is built on trust, and that trust is physically manifested in the belay device. This small metal gadget, when used correctly by your partner (the belayer), controls the rope friction to catch your falls and lower you smoothly. It’s almost always paired with a locking carabiner.
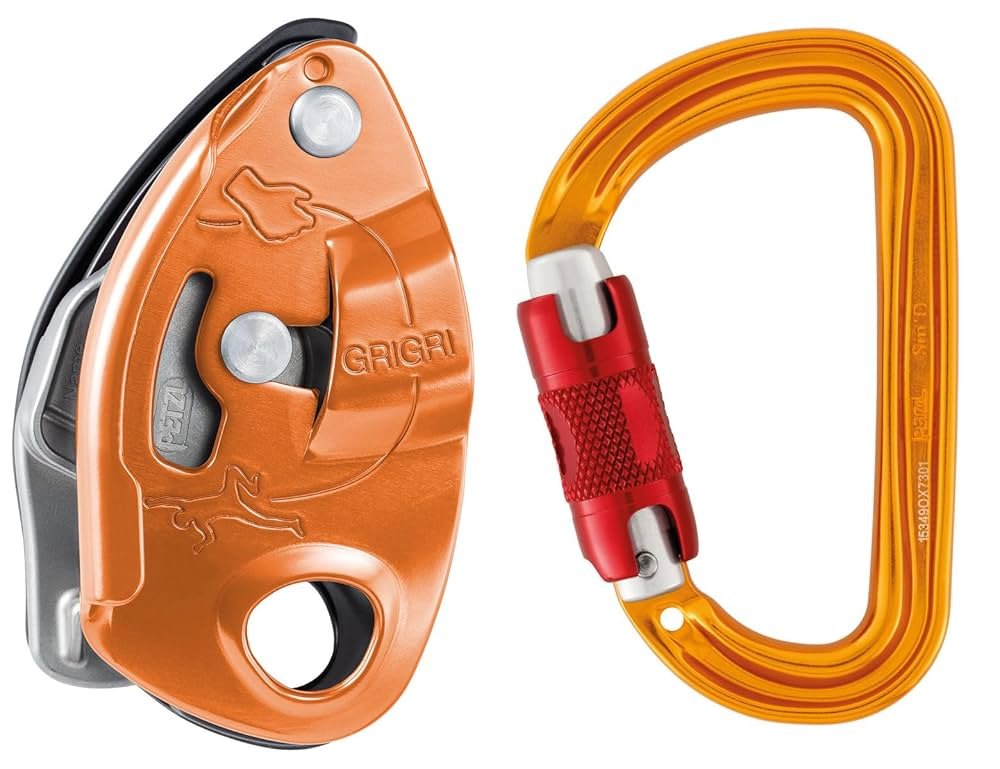
Why They’re Essential: The belay device is the brake in the system. It allows the belayer to easily feed rope out as you climb up, but it locks down on the rope to arrest a fall. The locking carabiner is the secure link that attaches the belay device to the belayer’s harness. Its locking gate prevents it from accidentally opening under any circumstance.
What to Look for as a Beginner: There are two main categories of belay devices: tube-style (like a Black Diamond ATC) and assisted braking devices, or ABDs (like the Petzl GriGri).
For a true beginner, an ABD is highly recommended. These devices have an internal mechanism that assists in “pinching” the rope during a fall, adding an extra layer of security. While they don’t replace proper belay technique, they provide a valuable backup. Tube-style devices are simpler and less expensive, but require more diligent technique from the belayer.
For your locking carabiner, a simple, pear-shaped (HMS) screw-gate carabiner is the perfect place to start. It’s versatile, strong, and the manual screw lock forces you to consciously check that it’s secure every single time.
The MindGearMen Pro-Tip: Buying a belay device is not enough. You must get hands-on instruction from a qualified professional at a climbing gym. Learn how to use your specific device correctly, practice catching falls in a controlled environment, and never become complacent. Your life, and your partner’s, depends on flawless belay technique.
4. Chalk and Chalk Bag: Your Grip Insurance
Ever tried to open a tight jar lid with wet hands? That’s what climbing without chalk feels like. As you exert yourself, your hands will sweat, compromising your grip and making you feel insecure on the holds.

Why It’s Essential: Climbing chalk, which is typically magnesium carbonate (MgCO3), is a desiccant. It works by absorbing the sweat and oil from your hands, dramatically increasing the friction between your skin and the climbing hold. This allows you to hold on longer, grip smaller features, and climb with more confidence. A chalk bag is simply the vessel that holds your chalk and clips to your harness for easy access mid-climb.
What to Look for as a Beginner: There are a few forms of chalk: loose chalk, chalk balls (a porous fabric ball filled with chalk), and liquid chalk. For gym climbing, a chalk ball is often preferred as it minimizes the amount of chalk dust in the air. For outdoor climbing, loose chalk is the classic choice.
When choosing a chalk bag, it’s mostly about personal preference. Find one with an opening that’s large enough for your hand to fit into easily. A stiff rim helps it stay open. A secure drawstring closure is a must to prevent your car and climbing bag from looking like a blizzard hit them. Most bags come with a simple waist belt.
The MindGearMen Pro-Tip: Less is more. You don’t need to cake your hands in chalk until they look like ghosts. A light, even coating is all you need. Over-chalking can actually polish holds and make them slicker. “Chalking up” before a difficult sequence is also a great mental ritual to help you pause, breathe, and focus.
5. Climbing Helmet: Your Most Important Brain-surance
In many indoor gyms, you might not see a lot of people wearing helmets, especially for top-roping. But make no mistake: a helmet is one of the most critical pieces of top climbing gear you can own, and it is non-negotiable for outdoor climbing.
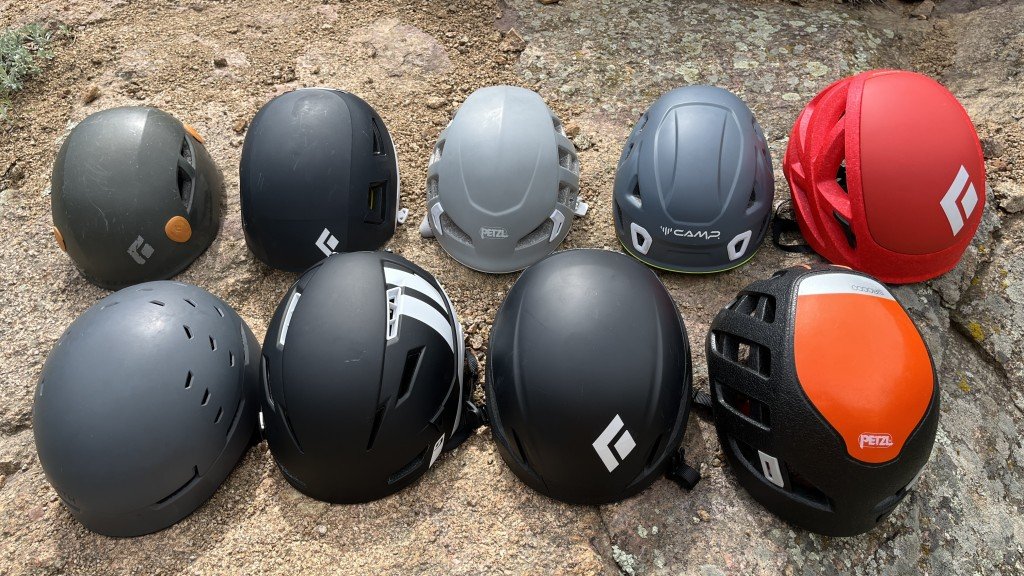
Why It’s Essential: A helmet protects your head from two primary dangers. The first is falling objects—loose rock, a dropped piece of gear from a climber above, etc. The second is impact from a fall, where you could swing into the rock face. You only get one brain; protecting it is the number one priority.
What to Look for as a Beginner: Modern climbing helmets are lightweight, comfortable, and well-ventilated. There are two main types: hardshell helmets and foam helmets.
Hardshell helmets are extremely durable and great at withstanding multiple small impacts, making them a fantastic, long-lasting choice for beginners. In-mold foam helmets (similar to bike helmets) are lighter but are generally designed to be replaced after one significant impact.
Look for a helmet that is climbing-specific and UIAA-certified. It should fit snugly without wobbling when you move your head, and the straps should be comfortable and easy to adjust.
The MindGearMen Pro-Tip: Start the habit early. Wear your helmet every single time you climb outdoors, even if the area is considered “solid.” It’s easy to get complacent, but the one time you need it, you’ll be profoundly grateful you have it on. Making it a non-negotiable part of your routine removes any debate.
6. Climbing Rope: The Lifeline
The climbing rope is the heart of the safety system, the dynamic link that tethers the climber to the belayer. While most gyms provide ropes for top-roping, owning your own is a major step towards becoming a self-sufficient climber, especially as you venture outdoors.
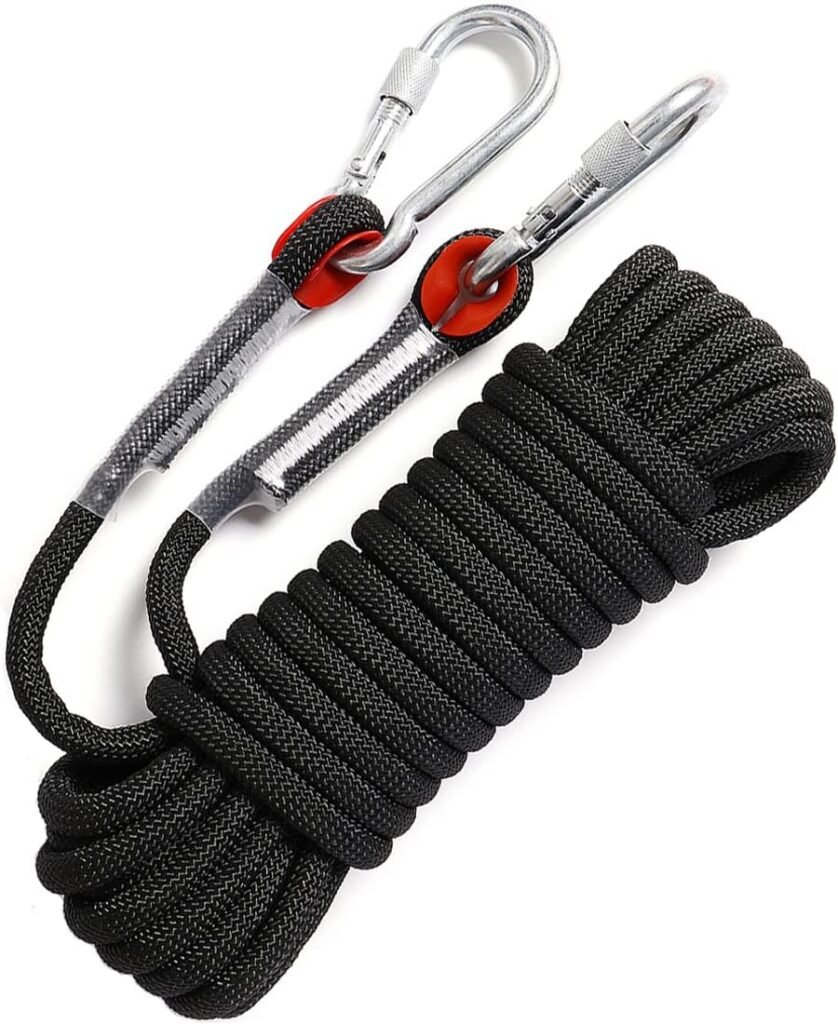
Why It’s Essential: Climbing ropes are “dynamic,” meaning they are designed to stretch slightly to absorb the energy of a fall. This creates a “soft catch,” dramatically reducing the peak force on the climber and the gear. It is, quite literally, your lifeline.
What to Look for as a Beginner: When you’re ready to buy your first rope, look for a single, dynamic rope. For diameter, something in the range of 9.5mm to 10.2mm is a great workhorse. These thicker ropes are more durable and handle better in most belay devices, which is great for learning.
For length, a 60-meter rope is the standard for most climbing areas. It provides plenty of length for most single-pitch climbs and lowers. Consider a “dry-treated” rope if you plan to climb outdoors frequently, as this treatment helps it resist water and dirt, extending its life.
The MindGearMen Pro-Tip: Your rope is life-saving equipment, so treat it with respect. Always use a rope bag or tarp to keep it out of the dirt, which can work its way into the fibers and cause internal abrasion. Inspect your rope regularly for any fraying, soft spots, or core damage. And always, always know the history of your rope—never buy one used.
7. A Good Climbing Bag: The Unsung Hero
Okay, you’ve got all this amazing new gear. Now, how are you going to carry it all? Tossing a $200 rope and expensive gear into an old school backpack just isn’t going to cut it. A dedicated climbing bag is designed for the job.
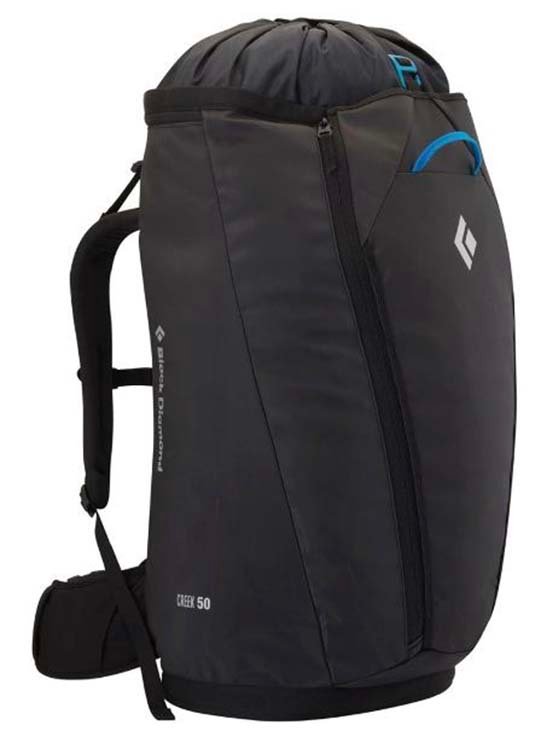
Why It’s Essential: A good pack keeps your top climbing gear organized, protected, and easy to transport. They are built from rugged, abrasion-resistant materials that can handle being dragged around at the crag. Many come with features specifically for climbers, like integrated rope tarps, external straps for your helmet, and easy-access pockets.
What to Look for as a Beginner: A crag pack with a capacity of around 35-45 liters is a perfect starting point. This is large enough to hold your rope, harness, shoes, helmet, chalk, water, and snacks without being overly bulky. Look for a bag with a panel-loading or duffel-style opening, which allows you to see all your gear at once without having to empty everything out. Padded shoulder straps and a supportive back panel are a must for a comfortable approach to the cliff.
The MindGearMen Pro-Tip: Pack your bag the same way every time. This creates a system where you know exactly where everything is. It also serves as a mental checklist. When you see that empty spot where your locking carabiner should be, you’ll know to grab it before you leave the house.
Frequently Asked Questions (FAQ) for Beginner Climbers
Getting your first set of top climbing gear is exciting, but it naturally comes with a lot of questions. Here are answers to some of the most common queries we hear from new climbers.
1. How much will all this beginner gear cost?
This is the big question for many people. While climbing isn’t the cheapest hobby, getting started is more accessible than you might think. For a solid beginner package including shoes, a harness, a belay device with a locking carabiner, and a chalk bag with chalk, you should budget between $300 to $500 USD.
A helmet will add another $60-$100, and your own rope is the biggest single investment, typically costing $150-$250. Remember, this is an investment in your safety and enjoyment that will last for years.
2. Should I rent gear or buy it right away?
For your first one or two visits to the climbing gym, absolutely rent. This allows you to try the sport without a major financial commitment. Gyms typically rent out shoes, harnesses, and belay devices.
Once you’re sure you’re hooked (and you probably will be!), we recommend buying your own gear, starting with shoes and a harness. Having your own shoes that are perfectly fitted to your feet will instantly improve your climbing. Your own harness guarantees a comfortable fit and you’ll know its complete history, which is a key safety factor.
3. Is it safe to buy used climbing gear?
This is a critical safety question. We have a very firm rule here: NEVER buy used “soft goods.”
- Soft Goods: This includes your rope, harness, and any slings or runners. The structural integrity of these nylon products can be compromised by things you can’t see, like UV radiation, falls, or contact with chemicals. You have no way of knowing the history of used soft goods, so the risk is simply not worth it.
- Hard Goods: This includes carabiners, belay devices, and other metal gear. While generally safer to buy used than soft goods, it’s still risky for a beginner who doesn’t know how to spot micro-fractures or dangerous levels of wear.
- Shoes & Chalk Bags: These are generally safe to buy used, though hygiene and fit can be an issue with shoes.
Our final advice: When it comes to safety equipment, always buy new from a reputable dealer. Your life is worth more than the few dollars you might save.
4. What are some reputable climbing gear brands?
While there are many great companies out there, a few have consistently stood the test of time and are known for their quality and commitment to safety. You can’t go wrong starting with gear from brands like:
- Black Diamond
- Petzl
- La Sportiva (especially for shoes)
- Scarpa (especially for shoes)
- Mammut
- Arc’teryx
Sticking to well-known, certified brands ensures your gear has undergone rigorous testing and meets international safety standards.
5. Do I need different gear for climbing in a gym versus outdoors?
The core kit is the same: your shoes, harness, chalk bag, and belay device/carabiner will be used in both environments. However, moving outdoors requires a few non-negotiable additions:
- A Helmet: This is mandatory for outdoor climbing to protect you from falling rocks and impact.
- Your Own Rope: You will need your own rope and the knowledge of how to care for it.
- Additional Gear: Depending on the type of outdoor climbing, you’ll eventually need things like quickdraws (for sport climbing) or a full rack of trad gear. But for your first trips, the essentials listed in this article are what you’ll need.
6. How do I take care of my new gear?
Proper care extends the life of your gear and keeps it safe.
- Rope: Keep it clean and out of the dirt by using a rope bag. Avoid stepping on it. Store it in a cool, dry place away from sunlight and chemicals.
- Harness: Hang it up to air out after use. Occasionally you can wash it by hand with a mild soap specifically for technical gear. Store it like you would a rope.
- Shoes: The most important thing is to let them air out completely after each session! Do not leave them stuffed in your pack. This will drastically reduce the dreaded “climbing shoe smell.”
- General Rule: Always inspect your gear before each use. Look for unusual wear, fraying on your harness, or damage to your carabiner’s gate. If something looks wrong, retire it.
Your Adventure Awaits
Stepping into the world of climbing is an investment—an investment in your health, your mindset, and your sense of adventure. This list of top climbing gear is your foundation. It’s the equipment that will keep you safe, build your confidence, and allow you to fully immerse yourself in the incredible challenge and joy of moving up a rock face.
Remember that gear is only half the equation. The other half is knowledge. Seek out instruction, find experienced mentors, and always prioritize safety above all else.
Now you have the map. The only thing left to do is take that first step. Gear up, find a partner, and discover just what you’re capable of. The wall is waiting.
Ready to start your climb? What piece of essential climbing gear are you most excited to get your hands on? Let us know in the comments below, and be sure to share this guide with a friend who’s ready to join you on your vertical journey! Also don’t forget to subscribe to MindGearMen.