Close your eyes. Listen. Can you hear it? That gentle, rhythmic tapping. The soft, close whisper that seems to travel directly from the speaker to the intricate pathways of your ear. The delicate crinkle of a wrapper, magnified into a symphony of texture. If you just felt that signature, blissful wave of static wash over your scalp and down your spine, you understand the profound power of ASMR.
This sensation—the Autonomous Sensory Meridian Response—is the reason millions of people tune into their favorite creators every single night. It’s a digital sanctuary of calm in a chaotic world. You’ve felt its magic, and now you feel the pull to create it yourself. You want to be the one behind the microphone, crafting sounds that soothe, relax, and transport.
But standing at the threshold of creation, the technical gear can seem like an insurmountable wall of jargon and options. What truly matters? Where should you invest your hard-earned money for the biggest impact?
Forget the confusion. This is your definitive guide. We are cutting through the noise to bring you the Top 5 most critical pieces of ASMR gear. We will explore not just what you need, but why you need it, going deep on each component to transform you from an aspiring enthusiast into a confident, well-equipped creator.
Table of Contents
Why Focusing on Core Gear is Your Key to Success
In the world of ASMR, there’s a direct, unbreakable link between the quality of your gear and the quality of the tingles you can produce. Your audience craves intimacy and detail. They want to feel like they are in the room with you. Hissy audio, distracting background noise, or grainy, dark video instantly shatters that illusion.
But you don’t need a Hollywood studio budget to start. The secret is to invest intelligently in the core components that deliver 90% of the results. By mastering these five key areas, you’ll be building your channel on a rock-solid foundation of quality that will captivate your audience and keep them coming back for more.
#1: The Microphone (The Heartbeat of ASMR)
If you only have the budget to splurge on one item, this is it. Your microphone is not just a piece of equipment; it’s the very soul of your ASMR channel. It’s the conduit through which all your carefully chosen sounds will travel. A great microphone captures the nuance, the texture, and the closeness that makes ASMR work. A bad one simply captures noise.
Let’s explore the best options for capturing those tingle-inducing sounds.
The Gold Standard: Binaural Microphones
When you hear a sound in an ASMR video that seems to move from your left ear, around the back of your head, and to your right, you’re experiencing binaural audio. These microphones use two separate capsules, often housed in realistic silicone ears, to record sound in the same way your own two ears do. This creates an uncanny, three-dimensional soundscape that is the absolute pinnacle of immersion.
- Why it’s #1 for Immersion: For roleplays (haircuts, ear cleaning) or any trigger involving movement, nothing beats binaural. It’s the closest you can get to tricking the brain into believing the sound source is physically present.
- The Icon: The 3Dio Free Space is the most recognizable binaural mic in the game. Its performance is legendary and is a clear signal to viewers that you are serious about immersive audio.
- Clever Alternative: In-ear binaural mics, like the Sound Professionals SP-TFB-2, are a fantastic, more affordable option. You wear them like earbuds, and they use your own head’s unique acoustic properties to create a perfectly tailored binaural field.
The Workhorse: Condenser Microphones
Condenser mics are prized for their sensitivity and ability to capture pristine, high-fidelity sound. They are exceptionally good at picking up the fine details in triggers like tapping, crinkling, brushing, and whispering. They are the versatile all-rounders of the ASMR world.

The biggest choice you’ll make here is between a USB or an XLR connection.
| Feature | USB Microphones | XLR Microphones |
| Simplicity | Plug-and-play. Connects directly to your computer. | Requires an audio interface and XLR cable. |
| Sound Quality | Good to excellent. Perfect for starting out. | Excellent to professional. Lower self-noise. |
| Best For | Beginners, creators prioritizing simplicity. | Creators seeking the absolute best audio quality and control. |
| Examples | Blue Yeti, Rode NT-USB+ | Rode NT1, Shure SM7B, sE Electronics sE8 |
- Understanding “Self-Noise”: This is a crucial spec for ASMR. It’s the faint hiss a microphone generates just by being on. In the ultra-quiet world of ASMR, a mic with low self-noise (like the Rode NT1, famous for being one of the quietest mics in the world) is a massive advantage. It means your silences are truly silent.
#2: The Audio Interface (The Brains of the Operation)
If you choose the superior path of an XLR microphone, an audio interface is your command center. Think of it as the central nervous system connecting your high-quality mic to your computer. It might seem technical, but its job is simple and profoundly important.
It provides three critical functions:
- Clean Preamplification: The signal coming out of an XLR mic is very weak. An interface’s “preamps” boost this signal to a usable level. The key word here is clean. For quiet ASMR sounds, you have to turn the gain (volume) knob way up. A cheap preamp will introduce a loud hiss as you increase the gain, ruining your recording. A quality preamp, like those in the interfaces below, provides clean gain, allowing you to amplify whispers without adding noise.
- High-Quality Conversion: It takes the analog signal from your mic and converts it into a digital signal your computer can work with. Better converters mean a more faithful and detailed sound.
- Stable Phantom Power: Most condenser mics require a 48-volt power source to function, known as “Phantom Power.” An audio interface provides this with the simple push of a button.
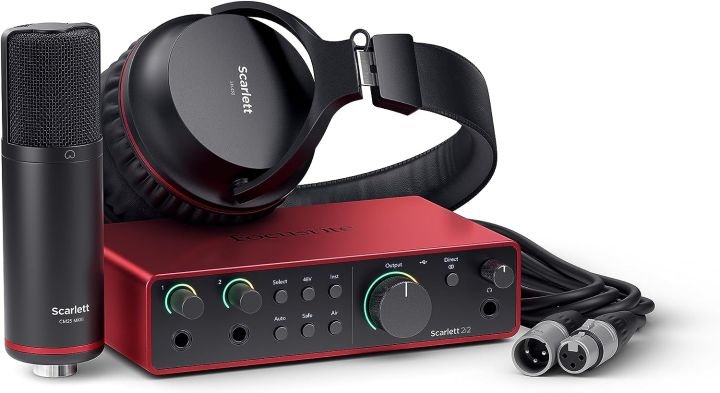
- The People’s Champion: The Focusrite Scarlett 2i2 is arguably the most popular interface on the planet. It’s incredibly user-friendly, built like a tank, and its preamps are impressively clean for its price point. It’s the perfect first interface.
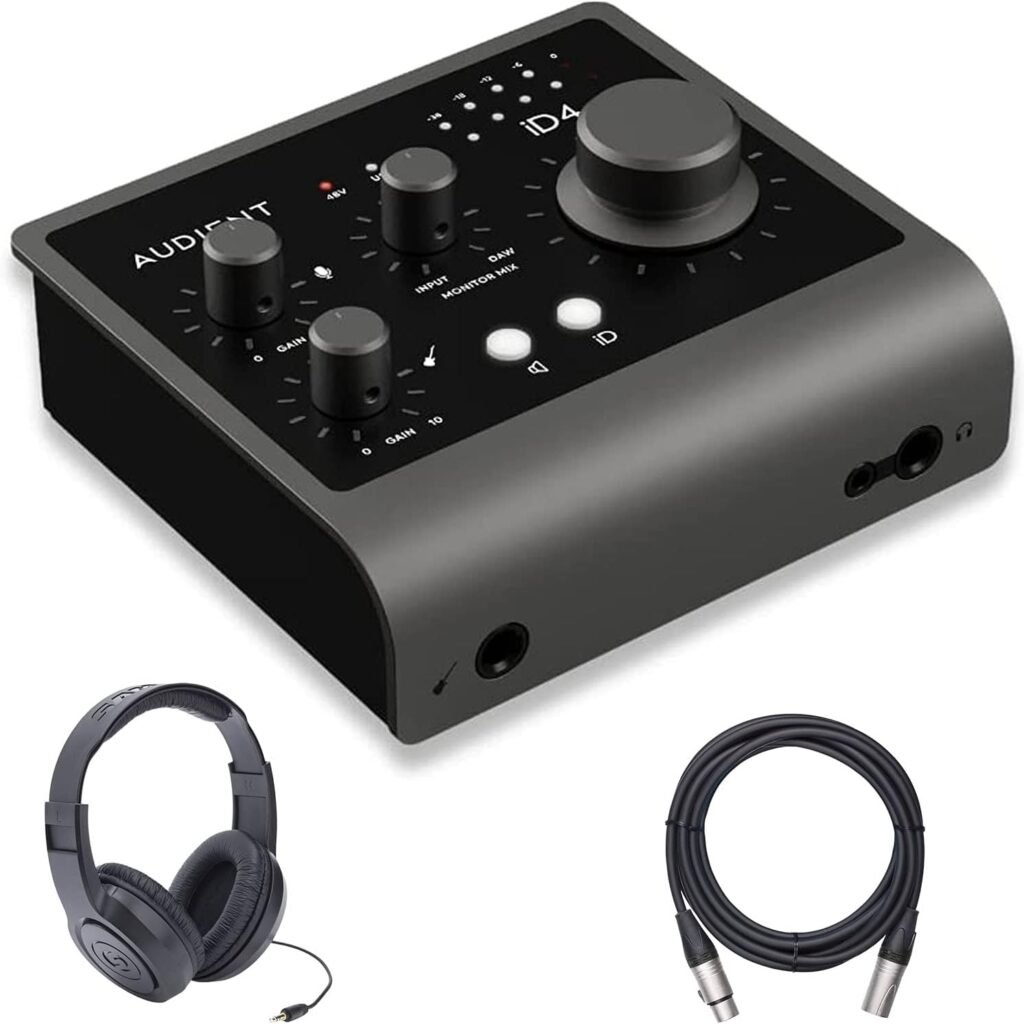
- The Audiophile’s Choice: For those wanting to eke out every last drop of quality, the Audient iD4 MKII or MOTU M2 offer even more pristine preamps and converters, giving your audio a noticeable edge in clarity and purity.
#3: Studio Headphones (Your Quality Control System)
Recording ASMR without headphones is like trying to paint a portrait while blindfolded. You absolutely must hear what your microphone is hearing, in real-time. This is called “monitoring,” and it is non-negotiable for quality control.
Headphones are your first and last line of defense against disastrous audio problems:
- The low hum of a nearby appliance you’ve tuned out.
- The sound of your own breathing or stomach rumbling.
- Harsh “plosive” sounds (‘P’s and ‘B’s) that are painfully loud on the mic.
- The distant sound of traffic outside.
For recording, you need Closed-Back Studio Headphones. The “closed-back” design creates a seal around your ears. This is crucial for two reasons: it blocks out room noise so you can focus on the mic’s signal, and it prevents the sound from the headphones from leaking out and being recorded by your highly sensitive microphone.
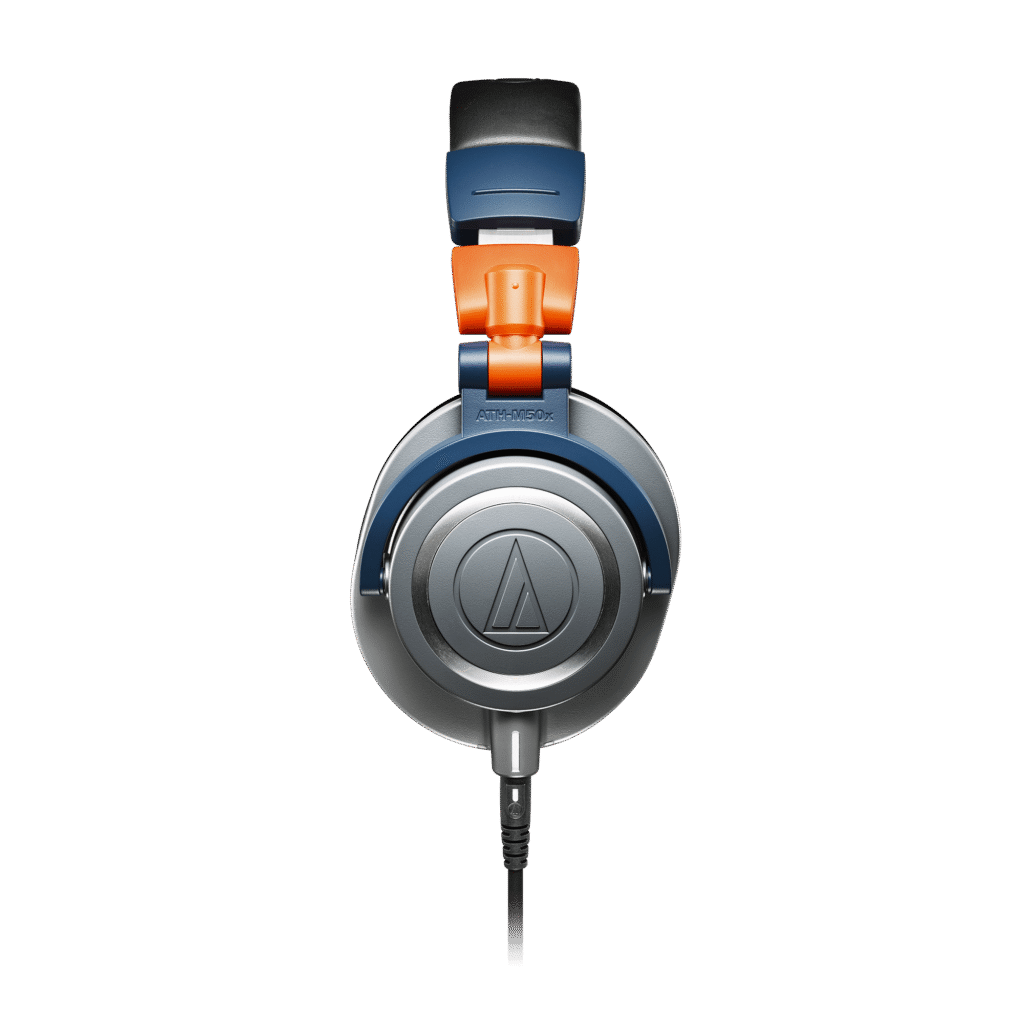
- The Industry Standard: The Audio-Technica ATH-M50x and Sony MDR-7506 are legendary studio staples. They provide a flat, honest frequency response, meaning they don’t artificially boost the bass or treble. They show you the truth of your audio, warts and all.
- The Comfort King: The Beyerdynamic DT 770 PRO is famous for its velour earcups and exceptional comfort, making it a fantastic choice for the long recording and editing sessions that ASMR requires.

#4: Camera & Lighting (Crafting the Visual Experience)
While sound is king in ASMR, the visual component is the queen that completes the kingdom. A good visual experience builds trust, enhances triggers, and creates a professional atmosphere that invites the viewer to relax and stay. We group these two together because they are inextricably linked; you cannot have a great image without great light.
The Camera: Your Window to the Viewer
The goal for video is often to achieve that beautiful, cinematic look with a sharp subject and a soft, blurry background (called “bokeh”). This is what separates a professional look from a basic webcam.
- The Secret is the Lens: This blurry background is created by the lens’s aperture. Look for a camera that allows you to use interchangeable lenses, and get a “prime lens” with a low f-stop number (e.g., f/1.8 or f/1.4).
- Smartphone (Good): Modern flagship phones from Apple or Samsung shoot incredible video. Use the main rear camera, mount it on a tripod, and you have a very capable starting point.
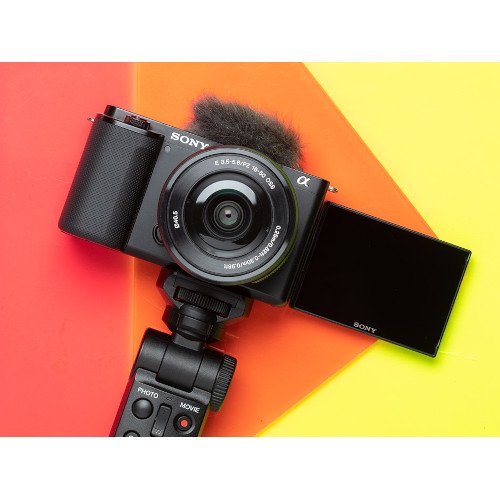
- Creator-Focused Mirrorless (Better): A camera like the Sony ZV-E10 or Canon M50 Mark II is a massive upgrade. They are designed for creators with flip-out screens, excellent autofocus, and the ability to change lenses. Pairing one with an affordable 50mm f/1.8 lens is a classic combo for stunning results.
The Lighting: Sculpting Your Scene
Lighting is the paintbrush for your video. Good lighting allows your camera to use optimal settings (like a low ISO to avoid grainy video) and lets you shape the mood of your scene. The gold standard is Three-Point Lighting.
- Key Light: Your main light source. An LED panel with a softbox (like those from Neewer or Godox) is perfect. It creates a large, soft, flattering light that wraps around your subject.
- Fill Light: A dimmer light on the opposite side, used to soften any harsh shadows created by the key light.
- Backlight: A light placed behind you that grazes your hair and shoulders. This creates a subtle “rim” of light that visually separates you from the background, adding a huge amount of polish and depth.
Even starting with just one large key light will revolutionize the quality of your video, making it look cleaner, sharper, and far more professional.
#5: The Microphone Support System (Stands, Mounts & Filters)
You’ve invested in a fantastic microphone. Now you need to give it the support system it deserves. Simply placing it on your desk is a recipe for disaster. This category includes the essential accessories that allow your microphone to perform at its peak, free from interference.
- The Boom Arm: This is one of the most impactful upgrades you can make. A boom arm (like the industry-standard Rode PSA1) clamps to your desk and suspends your microphone in the air via an articulated arm. This achieves two things: it isolates the mic from any thumps, bumps, or vibrations from your desk, and it gives you the freedom to effortlessly position the mic exactly where you need it for any trigger.
- The Shock Mount: Often included with quality mics or boom arms, this is a special cradle that suspends the microphone using elastic bands. It provides a final, crucial layer of isolation from any vibrations that might travel up the stand itself.
- The Pop Filter / Windscreen: This is your defense against plosives—the harsh, poppy air bursts from ‘P’ and ‘B’ sounds. A nylon or metal mesh pop filter sits a few inches in front of the mic, while a foam windscreen fits directly over it. For close-up whispering, this is not optional; it’s essential for clean, pleasant vocal audio.
Bonus: The Final 10% – Sound Treatment
You have all five core components. Your audio is clean, your video is crisp. But you still hear a slight, hollow echo in the room. This is the final boss of audio quality: room reflection. Sound waves from your voice and triggers bounce off hard surfaces like walls and ceilings, creating reverb.
The solution is sound absorption.
- The Pro Method: Mount acoustic panels on the walls around your recording space.
- The DIY Method: Hang heavy blankets or duvets on the walls. Lay a thick rug on the floor. Record in a walk-in closet filled with clothes. The goal is simple: surround yourself with soft, absorbent materials. This single, often free, step can make your audio sound dramatically more intimate and professional.
Frequently Asked Questions About ASMR Gear
You’ve read the guide, and your mind is buzzing with possibilities. But a few questions might still be lingering. Here are answers to some of the most common queries we see from aspiring ASMR creators.
Q1: What is the absolute first piece of gear I should buy if my budget is very limited?
Unquestionably, the microphone. Audio is the foundation of the entire ASMR experience. You can film with your phone and use a pile of pillows for sound treatment, but you cannot fake clean, detailed audio. Investing in a quality USB condenser microphone like a Rode NT-USB+ or a Blue Yeti will give you the single biggest leap in quality over any built-in computer or phone microphone. It is the cornerstone of your entire setup.
Q2: Can I genuinely start a successful ASMR channel using only my smartphone?
Absolutely, yes. Many successful creators started this way. Modern smartphones have incredibly capable cameras. The key is to work around the phone’s weaker microphone. To do this:
- Choose your space wisely: Record in the quietest, most sound-dampened space in your home, like a walk-in closet filled with clothes.
- Get close: Keep the phone’s microphone close to the trigger sound source.
- Upgrade the audio: For under $30, you can buy a simple lavalier or “lapel” microphone that plugs directly into your phone’s headphone jack or charging port (you may need an adapter). This small upgrade will dramatically improve your audio clarity and is the perfect “proof of concept” setup.
Q3: What really makes an “ASMR mic” different from a standard “singing mic”?
The main differentiating factor is self-noise. Self-noise (or Equivalent Input Noise – EIN) is the faint electronic hiss a microphone produces just by being turned on. When recording loud sources like singing or a drum kit, this hiss is completely inaudible. However, in the ultra-quiet world of ASMR, where you are recording delicate whispers and subtle crinkles, a microphone’s self-noise can become very noticeable.
Microphones favored for ASMR, like the Rode NT1, are chosen specifically because they have exceptionally low self-noise. This allows you to turn up the gain to capture quiet sounds without also turning up a distracting layer of hiss.
Q4: Do I need two microphones to get that left-to-right stereo sound?
Not necessarily. There’s a difference between stereo and binaural audio.
- Stereo Audio: This creates a basic left and right image. Many single microphones, like the Blue Yeti, have a built-in stereo mode that uses two capsules inside the one mic body to achieve this effect.
- Binaural Audio: This is the true 3D, “in the room with you” sound. To achieve this, you need two separate microphone capsules spaced apart like human ears. This is done with a dedicated binaural microphone (like a 3Dio) or by using a “matched pair” of two identical condenser microphones mounted on either side of a stand or a dummy head.
Q5: Realistically, how much should I budget for a high-quality beginner setup?
You can build a setup that sounds highly professional without breaking the bank. A fantastic starting point would look something like this:
- Great USB Microphone: (e.g., Rode NT-USB+, Elgato Wave:3) – $130 – $170
- Desk-Mounted Boom Arm & Pop Filter: (e.g., various brands on Amazon) – $40 – $80
- Reliable Closed-Back Headphones: (e.g., Audio-Technica ATH-M20x, Sony MDR-7506) – $50 – $100
For a total investment of roughly $220 – $350, you can have a core audio setup that will produce clean, professional, and tingle-worthy sound, setting you leagues apart from beginners using basic equipment.
Q6: How do I get rid of annoying background noises like my computer fan or air conditioning?
This is the eternal struggle of the ASMRtist! It’s a multi-pronged attack:
- Eliminate the Source: The best method is always to turn off the noise. Turn off your A/C, fans, and any humming appliances during your recording session. Use longer cables to move your computer tower as far away from the microphone as possible.
- Use Your Mic’s Pattern: Set your microphone to a Cardioid pattern. This pattern is heart-shaped, meaning it primarily picks up sound from the front and rejects sound from the rear. Point the front of the mic at your trigger and the back of the mic (its “deaf” spot) towards the noise source.
- Treat Your Space: Soft surfaces absorb sound. As mentioned in the main article, hanging blankets or recording in a closet deadens the room and helps absorb these stray ambient sounds before they reach your mic.
- Software Solutions: In post-production, use software like the free Audacity to run its “Noise Reduction” effect. For more power, dedicated plugins like those in iZotope’s RX suite can work miracles in cleaning up audio.
Q7: Is a 3Dio binaural microphone really worth the high price tag?
It depends entirely on the type of ASMR you want to create.
If your channel’s primary focus will be on immersive roleplays (like cranial nerve exams, haircuts, ear cleaning, etc.) where the 3D placement of sound is the main trigger, then yes, a 3Dio can be a worthwhile long-term investment. It is the undisputed king for that specific style and a signal of premium quality to viewers.
However, if your main triggers are tapping, crinkling, book sounds, affirmations, or general whispering, your money is far better spent on a top-tier condenser microphone and a high-quality audio interface first. A 3Dio is a specialized tool for a specific job—it’s a fantastic goal to aspire to, but not a day-one necessity for creating amazing ASMR.
Begin Your Creative Journey
Building your ultimate ASMR setup is a process, not a one-time purchase. Start with the most critical element—a great microphone—and build out your toolkit from there. Each piece on this list, from the interface that cleans your signal to the light that shapes your video, is a powerful tool for connection.
You are stepping into a role where you can provide genuine relaxation and comfort to people all over the world. Your gear is the instrument you will use to craft those moments of peace. Invest in it, learn it, and use it to share your unique creative voice.
What piece of ASMR gear is at the top of your wish list? Do you have a favorite we didn’t mention? Share your thoughts in the comments below!
For the most comprehensive reviews, head-to-head comparisons, and best deals on all the gear we’ve discussed, be sure to explore the other contents like this at MindGearMen.