You did it. The sleek, beautiful box is sitting on your craft table, and inside is your brand-new Cricut machine—a gateway to a universe of creativity. You’re already picturing the flawless vinyl decals, the professional-looking T-shirts, the stunning 3D paper art, and the personalized gifts that will make you a legend among your friends and family.
But then, you start looking at accessories, and a wave of anxiety washes over you. The sheer number of blades, pens, mats, and strange-looking gadgets is overwhelming. What’s actually essential? What’s a gimmick? And how do you build a toolkit that empowers you instead of just cluttering your craft room?
Stop right there. Take a breath. In the ever-expanding world of crafting for 2025, the secret to success isn’t owning every tool. It’s about mastering the right ones.
Forget the endless lists. We’re going to do a deep dive into the 5 most transformative Cricut tools you can own. These aren’t just accessories; they are game-changers. They are the workhorses that solve the biggest crafting headaches and unlock levels of quality you didn’t think were possible at home. Investing in these five tools will redefine your entire creative process, saving you time, money, and frustration.
Ready to build a truly powerful crafting arsenal? Let’s get into it.
Table of Contents
1. The Pro-Finish Duo: Brayer & XL Scraper
It might seem strange to start with something as simple as a roller and a plastic scraper, but trust me on this: these two tools are the unsung heroes of the Cricut world. They are the foundation of a perfect cut and a flawless application, solving the two most common beginner frustrations before they even happen.
The Big Question: What Are They, Really?
The Brayer is a small, handheld roller with a soft rubber surface. Its one and only job is to create a perfect, bubble-free bond between your cutting material and your Cricut mat.
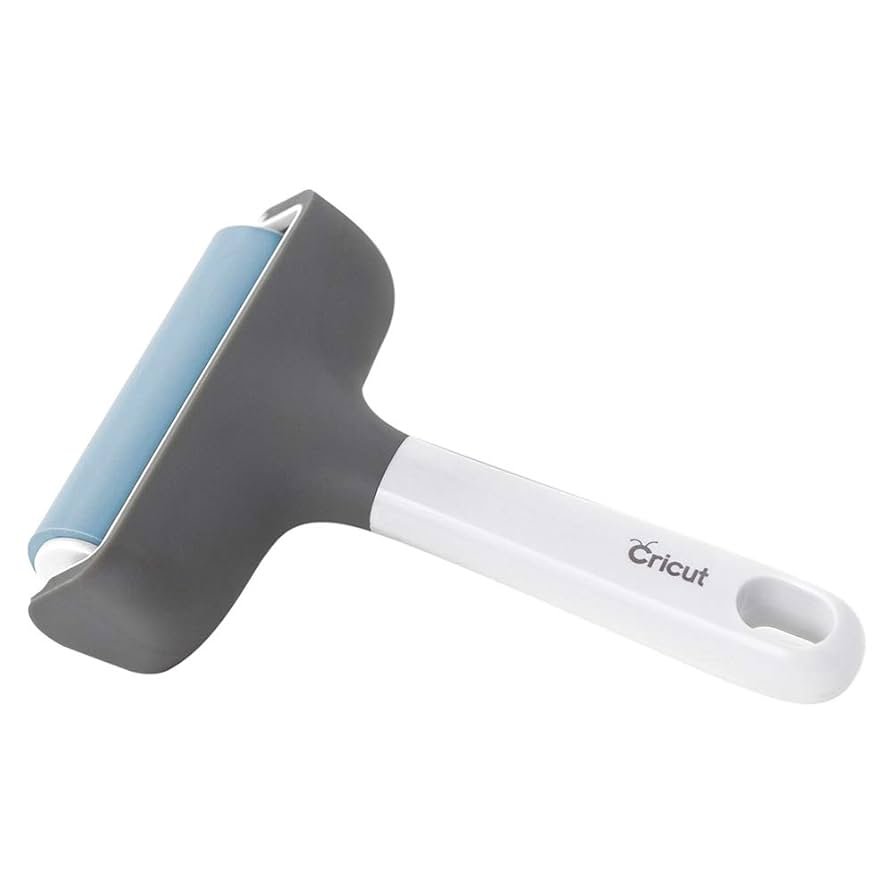
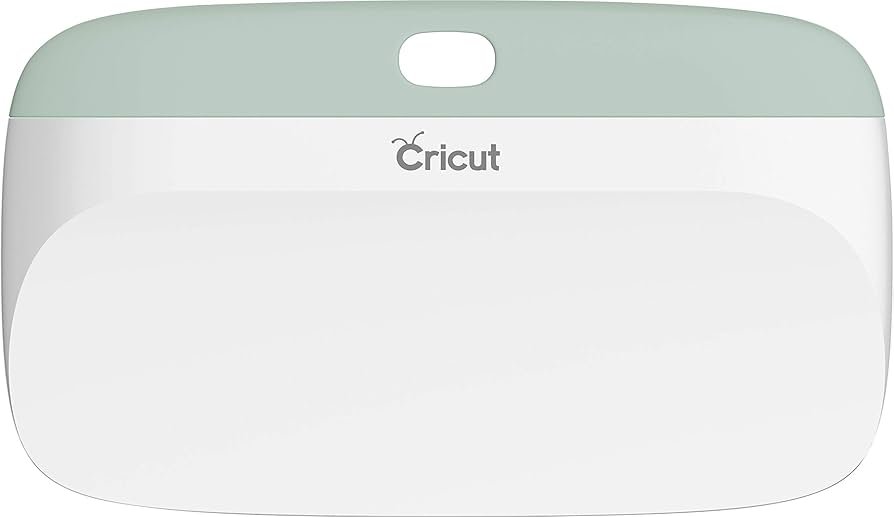
The XL Scraper is the super-sized version of the little scraper you might have seen. It’s a wide, flexible but firm piece of plastic used for two critical tasks: applying large vinyl designs and cleaning your used cutting mats.
The 2025 Game-Changer: Why They’re More Crucial Than Ever
In an age of high-definition everything, we expect clean, professional results. Nothing ruins the magic of a project faster than a slipped material or a bubbly decal. As materials become more varied and intricate designs more popular, securing your foundation is non-negotiable.
The Brayer is your insurance policy against cutting errors. When your vinyl, iron-on, or even delicate fabric is rolled firmly onto the mat, it won’t shift, lift, or bubble during the cutting process. This single action prevents your blade from snagging, tearing your material, and forcing you to start over. It’s the five seconds of prep that saves you thirty minutes of heartache.
The XL Scraper, on the other hand, is your key to a professional finish. When applying a vinyl decal, especially a large one on a sign or a wall, using your fingers or a credit card creates uneven pressure, leading to trapped air bubbles that are impossible to remove. The XL Scraper’s wide, even edge pushes the vinyl down smoothly, forcing all the air out for a painted-on look. Its secondary function—mat cleaning—is just as vital. Scraping off leftover paper bits and vinyl fuzz after a cut dramatically extends the life of your expensive mats, saving you serious money over time.
Deep Dive: Mastering the Duo
- The Brayer Technique: After placing your material on the mat, start from the center and roll outwards. Roll horizontally, then vertically. You’ll be amazed at how much more secure the material feels. For fabric on a FabricGrip mat, this step is absolutely essential to prevent shifting.
- The XL Scraper Application Method (The Hinge Method): For a large decal, start by placing it on your surface. Use a piece of painter’s tape to create a “hinge” down the middle. Lift one side of the decal, peel the backing away to the hinge, and cut the backing off. Now, using your XL scraper, start from the center hinge and push the vinyl down in overlapping, angled strokes. Remove the painter’s tape, and repeat for the other side. This technique gives you total control and a bubble-free finish.
- The Mat Cleaning Ritual: After you’ve peeled your project off the mat, take your XL Scraper and, holding it at a 45-degree angle, use firm, long strokes to scrape all the debris into a pile. You’ll restore so much of the mat’s stickiness this way.
Who Needs This Duo Most?
Honestly? Every single Cricut user. If you’re a beginner, it will save you from the most common early frustrations. If you’re an advanced user making large signs or selling your crafts, the professional finish it provides is non-negotiable. This is the first and best upgrade to your basic toolkit.
2. The Heat Transfer Hero: The Cricut EasyPress Family
If you’ve ever dreamed of making custom T-shirts, tote bags, or hats that look store-bought and last wash after wash, then you need to step away from your home iron. The Cricut EasyPress family isn’t just a fancy iron; it’s the key that unlocks permanent, professional heat transfer projects.
The Big Question: What Is It, Really?
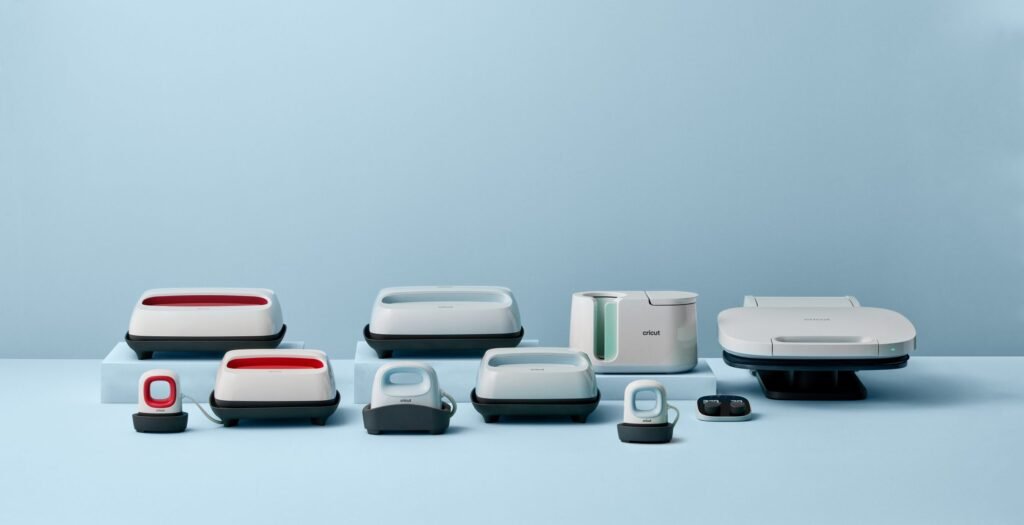
The EasyPress is a line of heat presses designed to deliver precise, consistent, edge-to-edge heat. Unlike a household iron which has a single heating element in the center and steam holes, the EasyPress has a ceramic-coated heat plate with elements running throughout, eliminating hot and cold spots. They come in several sizes:
- EasyPress Mini: A tiny, pointed press perfect for small, awkward shapes like hats, shoes, and stuffed animals.
- EasyPress 2 (9″x9″): The versatile workhorse, perfect for most T-shirts, tote bags, and pillows.
- EasyPress 2 (12″x10″): The large-format press ideal for bigger projects like hoodies, blankets, and oversized shirts.
The 2025 Game-Changer: Why It’s More Crucial Than Ever
The world of custom apparel and personalized goods is booming. From Etsy side-hustles to making gear for a family reunion, people want high-quality, durable results. The biggest failure point in this process is the heat application. Using a home iron is a gamble; you’re almost guaranteed to have parts of your iron-on vinyl (HTV) design peel up after a few washes because some spots got too hot and others not hot enough.
The EasyPress eliminates this gamble entirely. By allowing you to set a precise temperature (up to 400°F / 205°C) and an exact time, it provides the scientifically proven combination needed for a permanent chemical bond. This is especially critical for newer materials like Cricut’s Infusible Ink, which infuses the design into the fabric and absolutely requires consistent, high heat that an iron cannot provide. An EasyPress is an investment in durability and your reputation as a crafter.
Deep Dive: Mastering the EasyPress
- The Perfect Press Formula: The secret to success is a simple formula: Solid Surface + Pressing Mat + Pre-Press + Press + Post-Press.
- Work on a firm, flat, heat-resistant surface (an ironing board is too wobbly).
- Place a Cricut EasyPress Mat underneath your item to protect your surface and bounce heat back up.
- Always pre-press your garment for 5-10 seconds to remove wrinkles and moisture.
- Place your design, and press with the recommended time and temp (use the free Cricut Heat Guide online!). Apply light pressure and don’t move the press around.
- Flip the garment and press from the back for 15 seconds. Let it cool according to the material’s instructions (cool peel vs. warm peel) before removing the carrier sheet.
- Which Size is for You? If you can only get one, the 9″x9″ is the most versatile. If you know you’ll be making lots of baby onesies or customizing shoes, the Mini is a phenomenal addition. If you’re launching a T-shirt business, the 12″x10″ will speed up your workflow significantly.
- Common Mistake to Avoid: Don’t treat it like an iron! The magic of the EasyPress is that you place it down, hit the “Go” button, and hold it still. Sliding it around can smear your design and cause uneven adhesion.
Who Needs This Most?
Anyone who is even moderately serious about working with Heat-Transfer Vinyl (HTV) or Infusible Ink. If you want your custom apparel and fabric goods to last, this tool is not a luxury; it is an absolute necessity.
3. The 3D Master: The Scoring Wheel (for Cricut Maker)
If you’ve ever tried to fold a piece of thick cardstock and ended up with a cracked, messy-looking crease, you understand the fundamental challenge of paper crafting. The Scoring Wheel, an exclusive tool for the Cricut Maker series, is the elegant, powerful solution to this problem.
The Big Question: What Is It, Really?
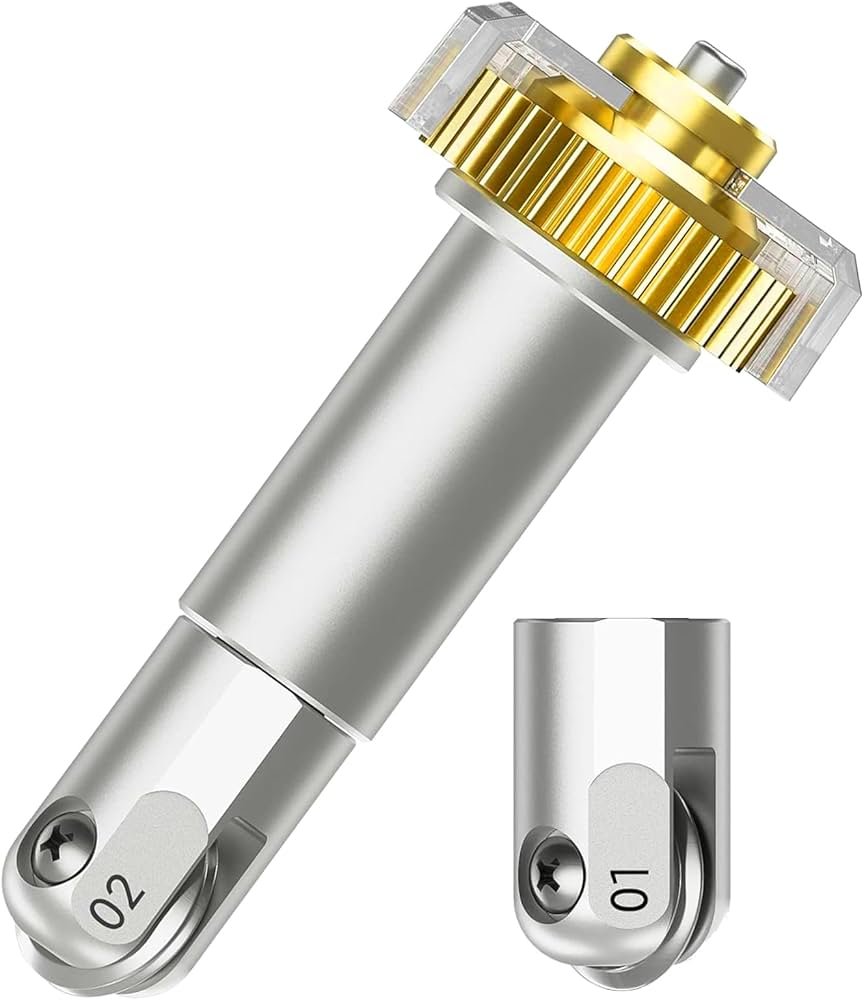
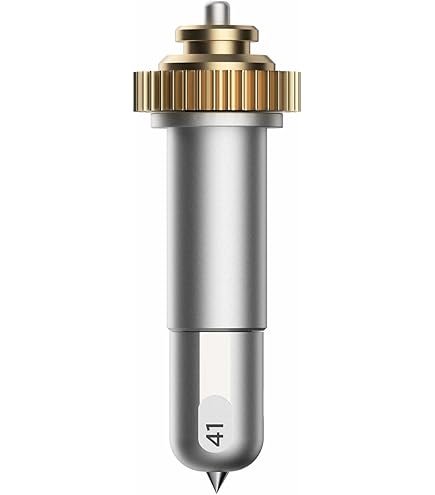
The Scoring Wheel isn’t a blade; it’s a tool with one or two small, free-rotating wheels at the tip. It fits into the Adaptive Tool System of the Cricut Maker, which allows it to apply up to 10 times the pressure of the older Scoring Stylus. It comes in two tips:
- Single Scoring Wheel (Tip 01): Creates one deep, crisp score line. Perfect for most light to medium cardstocks and uncoated materials.
- Double Scoring Wheel (Tip 02): Creates two parallel score lines. This is genius for thicker materials like coated paper or poster board. The double line allows the material to fold into the channel you’ve created, preventing any cracking on the outside surface.
The 2025 Game-Changer: Why It’s More Crucial Than Ever
Handmade packaging, intricate 3D paper art, and high-end greeting cards are incredibly popular. The difference between an amateur-looking box and a professional one lies in the quality of the folds. A poorly scored line leads to cracking, buckling, and an unstable final product.
The Scoring Wheel leverages the power of the Maker to create flawless, razor-sharp fold lines every single time. It completely replaces the need for a separate scoring board and bone folder for machine-cut projects. The pressure it exerts creates a deep crease that guides the paper into a perfect fold without damaging the fibers. This tool unlocks a new level of precision and professionalism for any 3D paper project, allowing you to create complex geometric shapes, gift boxes, and layered art that look like they were manufactured, not just handmade.
Deep Dive: Mastering the Scoring Wheel
- Understanding the Double Score: The Double Scoring Wheel is a masterpiece of design. When you see those two parallel lines, you should always fold your project so that the lines are on the inside of the fold. This allows the material on the outside of the fold to stretch gently, while the inside compresses into the scored channel, resulting in a perfect, crack-free corner.
- Material Matters: When Cricut Design Space tells you to use the Scoring Wheel, trust it. The software knows which materials are thick enough to require it. Using the older stylus on heavy cardstock will only result in a faint line that does little to prevent cracking.
- Project Ideas Unleashed: Think beyond simple cards. With the Scoring Wheel, you can create intricate gift boxes with complex lids, 3D paper succulents and flowers, layered shadow boxes (mandalas), and even paper lanterns. It turns flat paper into a structural building material.
Who Needs This Most?
Any Cricut Maker owner who is passionate about paper crafting. If you want to make cards, gift boxes, party favors, 3D models, or any paper project with a fold, the Scoring Wheel is the tool that will provide the most significant leap in quality for your work.
4. The Material Explorer: The Knife Blade (for Cricut Maker)
This is it. This is the tool that shatters the ceiling of what a home cutting machine can do. The Knife Blade transforms your Cricut Maker from a paper-and-vinyl cutter into a miniature, automated CNC machine capable of slicing through thick, rigid materials.
The Big Question: What Is It, Really?
Exclusive to the Cricut Maker and Maker 3, the Knife Blade is a powerful, extra-deep blade that operates within the machine’s Adaptive Tool System. Think of it as a super-sharp, computer-controlled X-ACTO knife. It doesn’t cut in a single pass. Instead, it makes a series of gradual, increasingly deep passes, carefully and precisely carving its way through materials up to 2.4mm (3/32″) thick.
The 2025 Game-Changer: Why It’s More Crucial Than Ever
The DIY and home decor trends are moving towards projects with more substance, texture, and dimension. People want to create things that feel real and permanent. The Knife Blade is the bridge to that world. It unlocks materials like:
- Balsa Wood & Basswood: For making custom models, puzzles, home decor signs, and cake toppers.
- Heavy Chipboard: For creating sturdy game boards, puzzles, and structural 3D art.
- Tooling Leather: For crafting custom keychains, bracelets, and wallets.
- Craft Foam: For cosplay and kids’ crafts.
This tool allows you to move beyond surface decoration and into the realm of creation and construction. It gives you the power to make finished goods that are robust and have a tangible, high-quality feel.
Deep Dive: Mastering the Knife Blade
- Patience is a Virtue: A Knife Blade cut is not fast. The multi-pass system means a complex project can take hours. This is normal. Start the cut and go do something else. The machine will handle it.
- Preparation is EVERYTHING: Your material cannot move during the cut. This is the golden rule. Always use a StrongGrip mat. More importantly, secure all four edges of your material to the mat with painter’s tape. This prevents any tiny shifts between passes.
- The Desktop Difference: Knife Blade projects can only be initiated from the Desktop version of Cricut Design Space, not mobile. This is because these complex cuts require more processing power and oversight.
- Start Simple: Don’t make your first project a hyper-detailed portrait cut from basswood. Start with a simple shape, like a star or a hexagon, to understand the process and how the blade interacts with the material.
Who Needs This Most?
The ambitious Cricut Maker owner. If you look at your machine and think, “I want to cut wood,” “I want to make leather goods,” or “I want to build 3D models,” then the Knife Blade is the key to unlocking your machine’s full, jaw-dropping potential.
5. The Foundation: The Essential Tool Set
We end where most people begin. While it may seem basic compared to a Knife Blade or an EasyPress, the humble Essential Tool Set is arguably the most important of all. It contains the everyday instruments that you will touch during every single project. Mastering their use is the first step to becoming a confident and efficient crafter.
The Big Question: What Is It, Really?
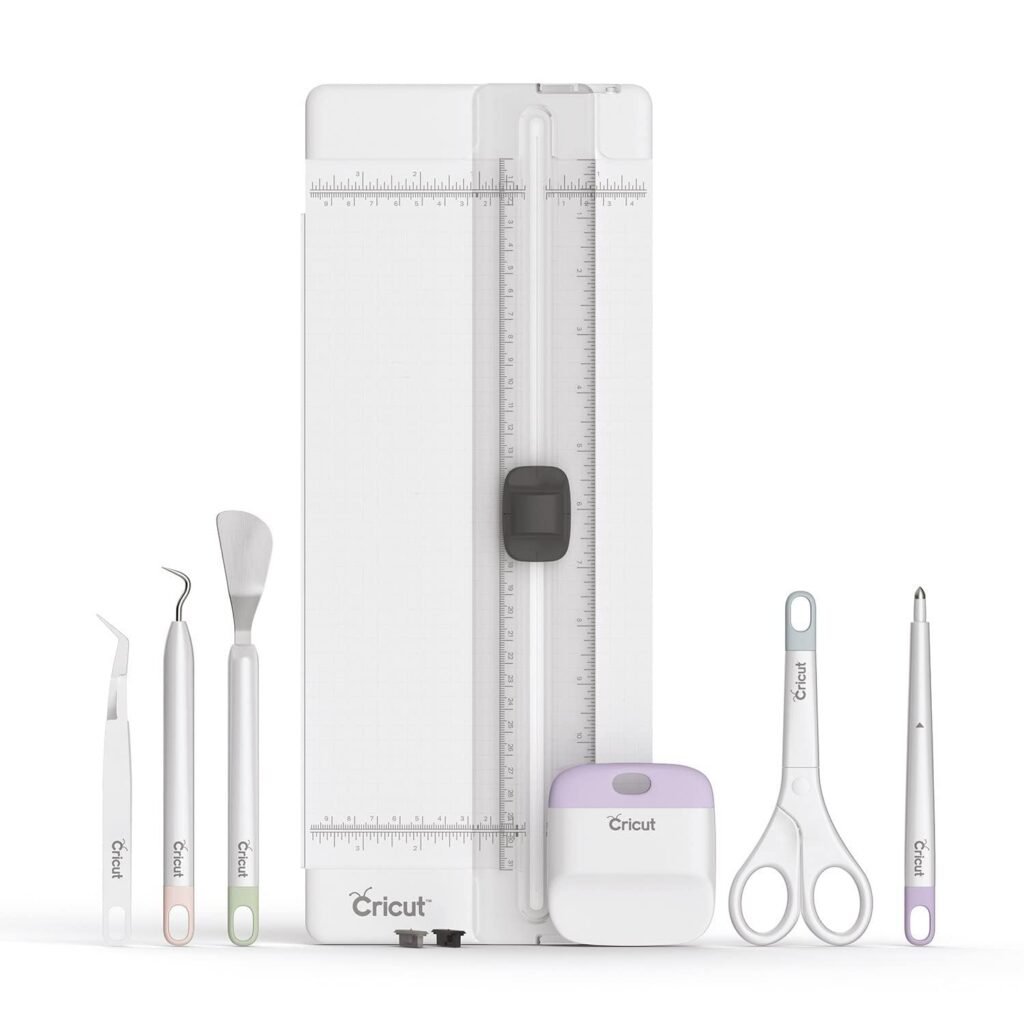
It’s the Swiss Army Knife for your Cricut. This 7-piece set typically contains the core hand tools you need for the “after the cut” process. Let’s break it down:
- The Weeder: A sharp, pointed tool for picking away the negative pieces of vinyl and iron-on. It’s the #1 most-used tool for decal and shirt makers.
- The Spatula: A thin, angled tool designed to slide under delicate cuts (like intricate cardstock) and lift them from the mat without tearing or curling.
- The Scraper: The small version of the XL Scraper, perfect for burnishing smaller vinyl decals and cleaning small scraps from your mat.
- The Tweezers: Great for picking up and placing tiny embellishments like rhinestones or small paper pieces. The reverse-grip feature is fantastic for holding something without constant pressure.
- The Scissors: Small, micro-tip scissors that are incredibly sharp, perfect for making precise snips in your material.
The 2025 Game-Changer: Why It’s More Crucial Than Ever
Efficiency and flow are everything in crafting. Nothing kills creative momentum faster than not having the right tool for the job. You don’t want to be trying to weed intricate text with your fingernails or trying to lift a delicate paper doily off the mat and tearing it.
This set provides the purpose-built solution for every common task. It professionalizes your process from day one. Using the spatula instead of your fingers protects your project. Using the weeder instead of a random pin gives you more control. Having these dedicated, ergonomic tools at your fingertips makes the entire crafting experience smoother, faster, and far more enjoyable. It builds good habits that will serve you throughout your entire crafting journey.
Deep Dive: Mastering the Essentials
- The Art of Weeding: For tiny pieces, push the point of the weeder down into the vinyl and then flick it away. For larger pieces, use the hook to grab an edge and pull at a low, 45-degree angle.
- The Spatula Lift: Don’t try to peel your delicate paper project off the mat. Instead, turn the mat upside down and peel the mat away from the paper, using the spatula to gently nudge any sticky spots loose. This keeps your paper perfectly flat.
- Organize for Success: Keep this set in a dedicated tool caddy or cup right next to your machine. The moment you need a tool, it should be within arm’s reach.
Who Needs This Most?
Every. Single. Cricut. Owner. Especially beginners. If you are unboxing your very first machine, this set should be in your shopping cart right alongside it. It is the true foundation of your entire Cricut toolkit.
Build Your Ultimate Toolkit
The world of Cricut crafting in 2025 is more exciting than ever, but you don’t need a room full of tools to make incredible things. You just need the right ones.
By focusing on these five game-changing tools, you are building a system that guarantees success. You’re ensuring your materials are prepped perfectly, your heat transfers are permanent, your 3D projects are flawless, and your creative potential is limitless. This is about investing in quality, efficiency, and above all, your own enjoyment of the craft.
So, take a look at your craft table and your creative dreams. Which of these tools will be the next step in your journey?
What is the one Cricut tool you absolutely cannot live without, or which of these five is at the top of your wish list? Share your thoughts in the comments below! Also don’t forget to subscribe to MindGearMen. Let’s help each other build the best crafting toolkits possible. Happy making!